How to Prepare for Weather Changes While Hiking National Parks
Preparing for unexpected weather changes while hiking in national parks involves packing appropriate gear, checking weather forecasts, understanding elevation impacts, and being adaptable to alter plans if conditions worsen.
Planning a hike in a national park? While stunning scenery is a given, unpredictable weather can quickly turn a dream trip into a challenging ordeal. Learn how to prepare for unexpected weather changes while hiking in national parks to ensure your safety and enjoyment.
Check the Forecast, But Don’t Rely on It Too Much
Before you even pack your bag, checking the weather forecast is an essential first step. However, it’s crucial to remember that weather in mountainous regions, common in many national parks, can change rapidly and local forecasts may not always be accurate.
Consider the forecast as a general guideline, not a guarantee. Understand that mountain weather is inherently unstable. Preparing for a range of possible conditions is always the best strategy.
Leverage Multiple Weather Sources
Relying on a single forecast can be risky. Cross-reference information from different providers, including the National Weather Service, local news channels, and weather apps. This will give you a more comprehensive understanding of potential weather patterns.
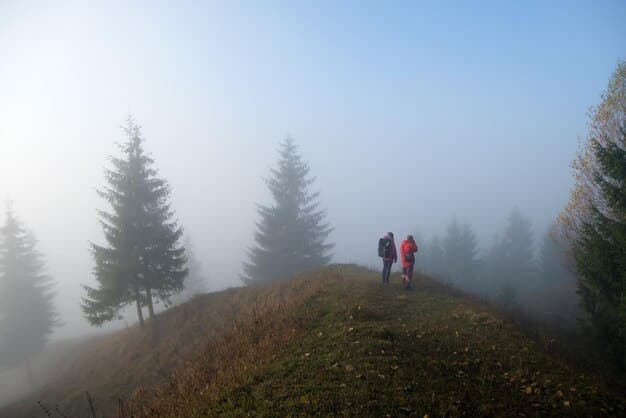
Pay Attention to Microclimates
National parks often encompass diverse terrain with varying elevations and exposures, leading to microclimates. These localized weather patterns can differ significantly from the general forecast. For example, one side of a mountain can be sunny and warm, while the other is shrouded in fog and rain.
- Observe wind patterns: Strong winds can indicate approaching storms.
- Watch for cloud formations: Cumulonimbus clouds often signal thunderstorms.
- Be aware of temperature drops: A sudden decrease in temperature can suggest incoming cold fronts.
Ultimately, being proactive and adaptable is the best defense against unexpected weather. Regularly assess the situation, and don’t hesitate to adjust your plans or turn back if conditions deteriorate.
Pack the Right Gear: Layers are Key
When it comes to hiking in national parks, packing strategically is crucial. Rather than overpacking, focus on versatile gear that can adapt to a wide range of weather conditions. The key is layering your clothing.
A layered system allows you to adjust your insulation and protection levels as needed. This ensures you stay comfortable, dry, and safe, regardless of what Mother Nature throws your way.
Base Layer: Moisture-Wicking Fabric
A good base layer is essential for regulating body temperature and managing moisture. Choose fabrics like merino wool or synthetic materials that wick away sweat and dry quickly.
Insulating Layer: Fleece or Down
An insulating layer provides warmth by trapping air. Fleece jackets are a popular choice for their affordability and breathability, while down jackets offer superior warmth-to-weight ratio. Consider bringing both for maximum flexibility.
Outer Layer: Waterproof and Windproof Shell

Your outer layer should shield you from wind, rain, and snow. Invest in a high-quality waterproof and windproof shell jacket and pants. Look for features like taped seams, adjustable cuffs, and a hood to maximize protection.
- Pack extra socks: Wet socks can lead to blisters and discomfort.
- Bring a hat and gloves: These accessories are crucial for retaining heat in cold weather.
- Consider gaiters: Gaiters prevent snow, rain, and debris from entering your boots.
Packing the right gear not only enhances your comfort but also significantly improves your safety in the face of unexpected weather. Being prepared with adaptable layers and essential accessories can make all the difference between a challenging experience and a memorable adventure.
Understand Elevation and Exposure
Hiking in mountainous national parks introduces unique challenges related to elevation and exposure. As you ascend, the air becomes thinner, temperatures drop, and weather patterns can change dramatically. Understanding these effects is paramount for safe and enjoyable hiking.
Exposure refers to the degree to which you are shielded from the elements. Hikes on exposed ridges or open slopes offer stunning views but also leave you vulnerable to wind, sun, and sudden weather changes.
Altitude Sickness
Altitude sickness, also known as acute mountain sickness (AMS), can affect individuals at elevations as low as 8,000 feet. Symptoms include headache, nausea, fatigue, and dizziness. Ascend gradually to allow your body to acclimatize.
Hypothermia
Hypothermia occurs when your body loses heat faster than it can produce it. Cold, wet, and windy conditions increase the risk. Recognize the symptoms, such as shivering, confusion, and slurred speech, and take immediate action to warm up.
Sun Exposure
The sun’s rays are more intense at higher elevations. Protect yourself with sunscreen, sunglasses, and a wide-brimmed hat. Even on cloudy days, UV radiation can be harmful.
- Plan your route carefully: Choose trails that match your fitness level and experience.
- Check elevation profiles: Understand the elevation gain and loss along your route.
- Be aware of exposed areas: Identify sections where you’ll be more vulnerable to the elements.
By understanding the effects of elevation and exposure, you can make informed decisions about your route, pace, and gear. This knowledge empowers you to navigate the challenges of mountain hiking safely and confidently.
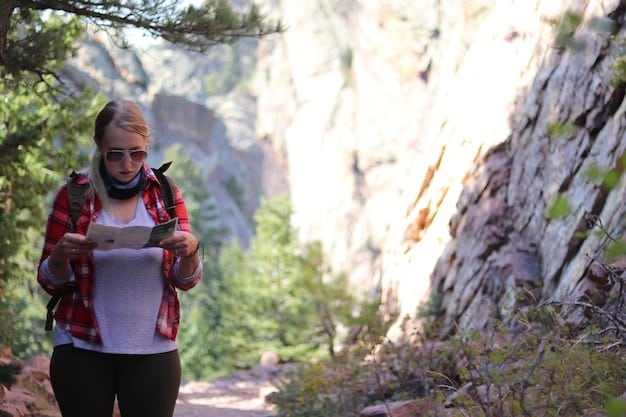
Learn Basic Navigation Skills
While technology offers convenient navigation tools, relying solely on electronic devices can be risky. Batteries can die, GPS signals can be lost, and devices can malfunction. Developing basic navigation skills with a map and compass is a crucial safety precaution.
Understanding how to read a topographic map, interpret terrain features, and use a compass to determine direction can be invaluable in situations where technology fails. This knowledge allows you to stay oriented and navigate effectively, even in challenging conditions.
Map Reading
Learn how to identify landmarks, contour lines, and other symbols on a topographic map. Understand how to determine your location and plan a route using the map.
Compass Use
Practice using a compass to take bearings and follow a specific direction. Know how to compensate for magnetic declination, the difference between magnetic north and true north.
GPS as a Backup
While it’s important to have map and compass skills, a GPS device can be a useful backup. Download maps for offline use and carry extra batteries or a power bank.
- Take a navigation course: Consider enrolling in a wilderness navigation course to learn essential skills.
- Practice regularly: Practice using your map and compass in familiar areas to build your confidence.
- Carry a whistle: A whistle can be used to signal for help in emergencies.
Developing basic navigation skills empowers you to take responsibility for your own safety and navigate confidently in the backcountry. By combining traditional techniques with modern technology, you can enhance your preparedness and minimize the risk of getting lost.
Know When to Turn Back or Change Plans
One of the most crucial decisions you’ll make while hiking is knowing when to turn back or change your plans. Recognizing when conditions are deteriorating and prioritizing safety over reaching a destination is a sign of experience and good judgment.
It’s important to set realistic expectations for your hike and be prepared to adjust your itinerary based on the prevailing weather conditions. Don’t let summit fever or a desire to complete the hike cloud your judgment.
Changing Weather
If you observe dark clouds, lightning, or a sudden drop in temperature, it’s time to turn back. Don’t wait for the storm to hit; make a proactive decision to retreat to a safer location.
Injuries or Fatigue
If you or a member of your group sustains an injury or becomes excessively fatigued, it’s important to reassess your plans. Continuing the hike could exacerbate the situation. Focus on providing first aid and safely returning to the trailhead.
Trail Conditions
Heavy rain can make trails slippery and dangerous. Snow or ice can obscure the path and increase the risk of falls. Be prepared to turn back if trail conditions become too challenging.
- Communicate with your group: Discuss potential scenarios and establish a plan for turning back.
- Trust your instincts: If something doesn’t feel right, don’t ignore your gut feeling.
- Inform someone of your plans: Tell a friend or family member your itinerary and expected return time.
Knowing when to turn back or change plans is not a sign of weakness but rather a demonstration of responsible decision-making. By prioritizing safety and adapting to changing conditions, you can minimize risks and ensure a positive outcome for your hiking adventure.
Emergency Preparedness is Not Optional
While hoping for the best is natural, preparing for the worst is essential when hiking in remote areas. Emergency preparedness is not an option; it’s a fundamental responsibility that can save your life or the lives of others.
Carrying a well-stocked emergency kit, knowing how to use it, and having a plan for communication are crucial components of responsible hiking. These measures empower you to handle unexpected situations with confidence and resilience.
First-Aid Kit
A comprehensive first-aid kit should include bandages, antiseptic wipes, pain relievers, blister treatment, and any personal medications. Familiarize yourself with the contents and know how to treat common injuries.
Navigation Tools
Carry a map, compass, and GPS device (with extra batteries). Know how to use these tools to determine your location and navigate to safety.
Shelter
Pack a lightweight emergency blanket or bivy sack to provide protection from the elements. These items can help prevent hypothermia and keep you warm and dry in unexpected situations.
- Water and food: Carry plenty of water and high-energy snacks.
- Headlamp or flashlight: Essential for navigating in the dark.
- Signaling devices: A whistle, mirror, or brightly colored cloth can be used to attract attention.
Emergency preparedness is not just about carrying the right gear; it’s about having the knowledge, skills, and mindset to handle unexpected challenges. By prioritizing safety and taking proactive measures, you can minimize risks and enjoy your hiking adventures with greater peace of mind.
| Key Point | Brief Description |
|---|---|
| 🌦️ Check Forecast | Monitor weather from multiple sources, understanding microclimates. |
| 🎒 Pack Layers | Bring moisture-wicking base, insulation, and waterproof shell layers. |
| 🧭 Navigate Well | Master map, compass, and use GPS as a backup. |
| ↩️ Turn Back | Know when to retreat due to weather, injury, or trail conditions. |
FAQ
▼
Use multiple sources like the National Weather Service, local news, and weather apps. Be mindful of microclimates and rapidly changing mountain weather conditions.
▼
Include a moisture-wicking base layer, an insulating layer (fleece or down), and a waterproof, windproof outer shell. Pack extra socks, a hat, and gloves as well.
▼
Ascend gradually to acclimatize. Stay hydrated, avoid alcohol, and be aware of symptoms (headache, nausea, fatigue). Descend if symptoms worsen.
▼
Seek shelter in a low-lying area away from trees and metal objects. Crouch down with your feet together and minimize contact with the ground.
▼
Pack a first-aid kit, navigation tools (map, compass, GPS), emergency shelter (blanket or bivy sack), water, food, a headlamp, and signaling devices (whistle, mirror).
Conclusion
Being prepared for unexpected weather changes while hiking in national parks is key to a safe and enjoyable experience. By checking multiple forecasts, packing the right gear, understanding the effects of elevation, honing your navigation skills, knowing when to turn back, and prioritizing emergency preparedness, you can confidently tackle the challenges of the backcountry and create lasting memories.


